Wednesday, December 16, 2015
Tuesday, December 01, 2015
November Stashbusting Overview...

I haven't even thought about my totals...except off the top of my head, I know I'm up this month...
We'll start with the fabric subtracted from the stash:
- 1 yard of Green Polka Dot Knit from Grandmother.
- 1 yard of Black Polka Dot Knit found at the B & B
- 1 extra large blouse from the refashion pile.
- Odds & Ends fabric scraps.
As you can see subtracting wasn't the best. Here we go to the addition...
- 4 1/2 yards Secret Fabric for Christmas gift found at the B & B. It is canceled out because the gift is finished and ready to be given!! (I'll be sharing the gift after Christmas!)
- 8 yards alien cotton found at the B & B
- 7 3/4 yards of cotton found thrifting at the B & B
- 4 yards gray checkered cotton found thrifting at the B & B
- 2 yards vintage cotton(?) found thrifting at the B & B
- 2 yards vintage duck found thrifting at the B & B
- 1 1/2 holly fabric found thrifting at the B & B
- 4 yards holly fabric found at the B & B
- 2 yards race car fabric from Hancocks Black Friday Sale...for a specific project.
If I didn't forget any that I acquired this month it looks like 30 yards has been added with only two going out...
Wow...this month was a very sad stashbuster...
Let's sew a lot this month!!
-'- Jewel
Friday, November 27, 2015
Gluten Free Coconut Oatmeal Walnut Chocolate Chip Cookie Bars(?) I need a catchy name.
Whatever you call them, they are delicious!
I didn't have to do a lot of adjusting to this recipe from Averie Cooks that you can find HERE.
1 large egg
1/2 cup [1 stick] butter, room temperature
1/2 cup light brown sugar, packed
1/2 cup granulated sugar
1 tablespoon vanilla extract
1 cup old-fashioned whole rolled oats (not instant or quick cook)
1/2 cup gluten free all purpose flour
1/2 cup coconut flour
1/2 cup sweetened shredded coconut
1/2 cup chopped walnuts
2 tablespoons gelled chia seeds
1 teaspoon baking soda
1 heaping cup semi-sweet chocolate chips
DIRECTIONS:
To the bowl of a stand mixer fitted with the paddle attachment (or large mixing bowl and electric mixer) combine the egg, butter, sugars, vanilla, and beat on medium-high speed until creamed and well combined, about 4 minutes.
Stop, scrape down the sides of the bowl, and add the oats, flour, coconut, walnuts, baking soda, chia seeds salt to taste, and beat on low speed until just combined, about 1 minute.
Stop, scrape down the sides of the bowl, and add the chocolate chips, and beat on low speed until just combined, about 30 seconds.
Using a 1/4-cup measure, or your hands, form approximately 12 equal-sized mounds of dough.

Place mounds on a large plate or tray, cover with plastic wrap, and refrigerate for at least 2 hours. (I'll be honest I'm not sure it was an entire 2 hours... Probably more like 45-60 minutes.) But Averie Cooks recommends not baking with un-chilled dough because cookies will bake thinner, flatter, and be more prone to spreading.
Preheat oven to 350F, place dough mounds on nonstick baking sheet, spaced at least 2 inches apart and bake for about 11 until edges have set and tops are just set, even if slightly undercooked, pale, and glossy in the center; don't over-bake! Cookies firm up as they cool. Allow cookies to cool on wire rack before serving. (Or eat one right out of the oven with a glass of whole milk. That's what my family and I did.)

Wednesday, November 25, 2015
Gluten Free Deliciousness + Chocolate Cheesecake Recipe!
I know what this looks like; Jewberly Emiris is jumping on the gluten free fad-wagon late. But it's not that, honest! About 2 years ago our sister Tiffany was diagnosed with gluten sensitivity and it really opened our eyes to the issues gluten causes if your body doesn't quite agree with it.
It's been suggested that eliminating harmful gluten (wheat, barley & rye) from our diets could help improve our overall health. As a result, Jewel & I (Kimberly) have been eating gluten free because of some of our health issues.
When we made the change, we knew we didn't want to do it with boxed this and pre-packaged that. Instead I've been substituting organic coconut flour or almond flour in some recipes, introducing quinoa as a new grain, and trying to make everything (from scratch) from minimally or unprocessed all-natural, healthy ingredients as much as possible.
With all being said, we've decided to start a gluten free recipe section on our blog! These are actual recipes (normally containing gluten) that I have personally prepared BUT made adjustments to so they are free of the harmful gluten.
First off... Chocolate No Bake Cheesecake with a Gluten Free Double Chocolate Cookie Crust!

I adapted this recipe from this Salted Double-Chocolate Olive Oil Cookie recipe and this Fudge Brownie No-Bake Cheesecake recipe.
For the crust:
1/3 cup unsweetened cocoa
1/3 cup cacao powder (or you can use Ghirardelli Sweet Ground Chocolate & Cocoa Powder)
1/3 cup packed almond flour
1/3 cup coconut flour
1/2 cup red palm & coconut shortening (I used Nutiva brand, it's organic, vegan and Non-GMO plus it tastes great!)
2 tablespoons salted butter, room temperature
1/2 cup white sugar
1/4 cup brown sugar (light or dark)
1 egg
1 tablespoon pure, good quality vanilla extract
1 cup semi sweet chocolate chips + 1/2 cup milk chocolate chips (or whatever combination you prefer)
Preheat oven to 350 degrees F.
Mix together cocoas, flours - set aside. Cream together sugars, butter and shortening. Mix in egg and vanilla. Add dry ingredients in parts, mixing continually. Mix in chocolate chips.
Press into the bottom of a greased springform pan (batter will be somewhat sticky, using a silicone spatula to spread may be the easiest.) You will have a little cookie batter left over - that's totally fine! Make them into cookies and bake for 3 minutes, then rotate the pan 180 degrees and bake another 3 minutes.
Bake the crust for 12 minutes - it seems short but don't over bake the crust! It will firm up as it cools. (I actually put mine in the freezer for a few minutes when it wasn't quite cool.)
While the crust is baking/cooling... for the filling:
12 ounces cream cheese, softened (1 1/2 8 oz. packages
1/2 cup sugar
1/4 cup (1/2 stick) unsalted butter, softened
1 1/2 cups semi-sweet chocolate chips
2 cups real whipped cream (1 cup of heavy whipping cream makes 2 cups whipped cream)
Beat together cream cheese, sugar and butter in large bowl on medium speed until smooth and creamy. (I actually just used a spatula but a mixer would be must easier and quicker).
In a small bowl add chocolate chips and heat in microwave for 30 second intervals. Stirring in between until chocolate is completely smooth and melted. Set aside to cool. Slowly add in cooled, melted chocolate chips, stirring until well blended. Fold in whipped cream until blended.
Spread on top of cooled brownies. Place in the refrigerator until firm, 60-90 minutes.
Final note: Jewberly Emiris is not sponsored by nor compensated in any way
by any of the products mentioned.
by any of the products mentioned.
Friday, November 06, 2015
Our YouTube Journey: Basic Knitting Series
In our "Basic Knitting" series TaMera teaches you the fundamentals of knitting.
When you can't quite get a technique come and see if we have a short, high quality and easy to understand video pertaining to that technique.
Just another way to help you succeed with your knitting.
Here's our first two videos:
Video 1: How To Cast On - Featuring An Arthritis Friendly Version
Video 2: How To Cast Off (Bind Off)
Tuesday, November 03, 2015
Reflections on Sew With Me September (The Sew-A-Long)
Overwhelmed with blessings.
That's seems to describe what I'm feeling.
I haven't formally announced it but I was the winner for the "Sew With Me Sew-A-Long". I think the reason being; I was am still in shock.
I won the Sew-A-Long with an ensemble of red heart cotton printed fabric that I used because I was bothered by it still being in the stash!
One of the things I enjoy about the Sew-A-Long group is you aren't judged by your sewing experience or how well you did. If you finish the project (In September's case, four coordinating pieces) by the end of the allotted time (and share it with the group) you are entered to win!

One of the things I enjoy about the Sew-A-Long group is you aren't judged by your sewing experience or how well you did. If you finish the project (In September's case, four coordinating pieces) by the end of the allotted time (and share it with the group) you are entered to win!

The Prizes
In no particular order I'm going to share the prizes!
Some of them were predetermined and others were chose from a list.
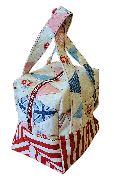
The Boxy Bag from So Sew Easy (PDF Pattern)
In the midst of making my Cargo Duffle Bag, Dad mentioned that he'd like a better bag for his gym stuff. Right now, he's using a square tote bag which he likes the size of but wishes it had a zipper and some stability in the sides. I'm pretty certain the Boxy Bag made bigger will be the answer!
Had to share this adorable patchwork one that I found online! -->
(Click on "Source" to go get more info on the bag pictured)
 |
| Source |
Angelina Shorts from Itch To Stitch (PDF Pattern)
I used the process of elimination for the pattern from Itch To Stitch!
She has some great patterns and this was the only way that seemed logical for me to get her an answer in a timely manner.
She has some great patterns and this was the only way that seemed logical for me to get her an answer in a timely manner.
The Angelina Shorts won out because I can't recall ever seeing a shorts pattern like this before.
I love the golden buttons and am wishing it was closer to warm weather so I could stitch some up!

Zaria Flow Skirt from Named Clothing (PDF Pattern)
Named Clothing let me choose a pattern from their 2 recent collections. Let me tell you...that was still too broad of a choice range! They have amazing patterns in both that it was still an incredibly hard decision. I enlisted Kimberly's help and we got it narrowed down to this 2 in 1 skirt pattern.
The pencil skirt version, has some cute top-stitching detail! I'm starting to figure out that I love small details in clothes!

Thread Theory is focused on getting quality menswear patterns to the home sewer and I couldn't be more pleased!
Thread Theory's pattern packages are the coolest! They come in a folder instead of an envelope, they include a garment tag for your make and a booklet full of the instructions and other useful information!
Cannot wait to get started on sewing my first piece of menswear!
 |
Cross Body Bag from So Sew Easy (PDF Pattern)
I've got the bag making bug while stitching up the Cargo Duffle and I wanted to have something more challenging up my sleeve. When I saw the Cross Body Bag which includes zipper pockets, a metal enclosure, adjustable and removable straps...I said
"This is it!"
"This is it!"

Fabric from Elliot Berman Fabrics
Wow. It's the most beautiful fabric I have ever seen! It is stunning!
Top Fabric: Digital Print Wool Silk Gazar from J. Mendel
Middle Fabric: Italian Cashmere Angora Wool Coating from Calvin Klein
Bottom Fabric: Classic Satin Brocade from Chanel
A cool tidbit is I had been looking for a online dealer with wools and finer fabric and here one gets dropped in my lap!!
Wow, it was such an amazing experience and I really need to get to sewing some if these!
Smiles!
-'- Jewel
Sunday, November 01, 2015
October Stashbusting Overview

Added to the stash:
1 Vintage Full Sheet (3-4 yards) Thrifted from the B&B
From the stash:
2 3/8 yards: With The Leaves I'll Fall - Blouse
3 1/8 yards: Little Rough Around the Edges - Dress
From the stash:
2 3/8 yards: With The Leaves I'll Fall - Blouse
3 1/8 yards: Little Rough Around the Edges - Dress
1 5/8 yards: McCall's 6706
7 1/8 yards out of the stash! Not as many as some months...but better then I expected!
Smiles,
-'- Jewel
Saturday, October 31, 2015
Little Rough Around The Edges... {Simplicity 1196}

It was cold this morning when we took these photos. I'm surprised you can't see my goosebumps in the pictures! (Promise, I didn't use airbrush lol) I wanted to get the photos taken so I could work on finishing the skirt that was also on my sewing desk. (The skirt is finished, photographed and waiting to be written up! Yay)

This dress was supposed to be a changing season type dress rather then a sun dress, It wasn't supposed to be sleeveless but the long sleeves with the pattern came out tiny!
(The pattern did give arm measurements)
Since, I'm trying to use the stash fabric I didn't have enough to make bigger sleeves.
The image that I had in my head (for the dress) was really cute and I still wish it would worked out.
...I'll have to keep it in mind for another time.

The pattern is Simplicity 1196 and the fabric is all from my Grandmother.

I'm glad that I actually stuck it through on this dress...even after the mountain of problems.
I named this post "Little Rough Around the Edges" because frankly it is.
Up close and on the inside you can see the "roughness". lol

It didn't come out at all like I planned...but it's still alright!
I might not wear until the spring though. haha

For my next project, I really want to sew a pair of Moji Pants from Seamwork Magazine. They would be great for work pants! :)
I'll also be joining in on the Japanese Knot Bag sew-a-long (here) you should join, too! It's going to be a ton of fun!
Smiles!
-'- Jewel
Fabric busted on this project: 3 1/8 yards (2.8575 m)
Fabric busted since March 1st, 2015: 63 1/8 yards. (57.7215 m)
See Jewel's pledge and get more information on the 2015 Stashbusting Sewalong HERE
We would love to hear from you! Say a quick "hello" in the comments!
Wednesday, October 28, 2015
Our YouTube Journey: The Bar Will NOT Be Lowered
Our first official video on YouTube was TaMera's "How To Knit A Dishcloth" video and without realizing it we had set the bar for what we wanted our videos to be.
What I mean by that is:
- The Quality
The camera focused on what TaMera's hands were doing so you could see exactly what was going on.
Her hands rarely went out of the screen.
- Easy to Understand
- Editing
This is not a pat on the back, but a explanation of why after hours and hours of work and two uploads we trashed a three part knitting video.

You may have noticed that last week we posted part one in "How To Knit A Flat Hat" and yesterday for a brief time part two was up on YouTube as well.
While part two was uploading to our channel, TaMera and I talked about how they didn't reach the bar that we wanted and felt like they were our first knitting videos rather than our second and third. They didn't feel thought out, the background was distracting, the audio was bad and overall it was not what we wanted.
Together we decided to ditch them and start anew on a different video. Neither of us have any remorse for our decision but we are disappointed in ourselves for not noticing it sooner so we could have been using our time on a project we were happy with.
In a platform of so many different voices we want to keep ours consistent, well done and something we can be proud of.
With that in mind we are heading into this new video with a new sense of purpose!
We are amazed that "How To Knit A Dishcloth" is at over 4,000 views and thankful for your lovely comments on it as well! They are an encouragement to us and we are challenged to keep making high-quality videos because of them!
-'- Happy Knitting,
Jewel & TaMera
Saturday, October 10, 2015
With The Leaves I'll Fall {Simplicity 2249}

Here is TaMera's blouse; it was finished in time for the fall festival she was volunteering at!

Let's talk about the seams... which are french seams and I have fallen in love with them! I wish I had known about the sooner! But, like my Mom mentioned "You are still learning and you can't learn everything at once." ...That's true. Very true!
Anyway, they are amazing! I love how clean the inside of the tunic looks. The only seam that isn't a french seam is the zipper seam...because can you even do a french zipper seam? I don't know...lol
If you want to try french seams (which you should because they are incredible!) cotton is a great fabric to start on! It's forgiving and doesn't do a lot of moving around.
...maybe I'll try doing a tutorial on them... hmmm, something to think about... :)

The pattern is Simplicity 2249 that Grandmother gave us. The tunic is version D with version A length sleeves.
The fabric was left over from about 14 years ago and there was just enough for the tunic!


From the stash:
-Fabric
-Zipper
-Thread
-Bias Binding (For neckline and sleeves)


I couldn't help but share all of these adorable pictures from the shoot! :)
-'- Jewel
Fabric busted on this project: 2 3/8 yards (2.1717 m)
Fabric busted since March 1st, 2015: 60 yards. (54.864 m)
See Jewel's pledge and get more information on the 2015 Stashbusting Sewalong HERE
We would love to hear from you! Say a quick "hello" in the comments!
Iowa Sheep & Wool Festival

In the beginning of June we went to the Iowa Sheep & Wool Festival! Here's a few snapshots for your enjoyment!


-'- Jewel
Saturday, October 03, 2015
Northern Flicker Woodpecker

Back in June, this little bird came to visit us!

Northern Flicker Woodpeckers frequently feed on the ground.


I'm pretty sure this one is a yellow-shafted flicker because "They are yellow under the tail and underwings and have yellow shafts on their primaries. They have a grey cap, a beige face and a red bar at the nape of their neck." (Source)

-'- Jewel
Thursday, October 01, 2015
September Stashbusting Overview

September was a fun month!
I participated in my first sew-a-long using fabric from the stash!
The Subtracting...
From the stash:
4 5/8 yards - Sew-A-Long Skirt & Sew-A-Long Blouse
1 3/8 yards - Sew-A-Long Shorts
2 yards - Sew-A-Long Bag: The Cargo Duffle Bag
8 yards out this month...not as impressive as August. But I am not complaining as I learned a lot of new techniques this month! Oh, and all that quilting on the bag...took, what felt like, FOREVER! lol

Onto the addition...
Added to the stash:
- Unmeasured Fabric from My Grandmother
- 1 Full Vintage Sheet with Daises from the B & B (3-4 yards)
The sheet was so adorable I couldn't leave there for someone to use as a plain ol' sheet. (Haha)
I'm thinking a crop top & high waisted skirt combo or something along those lines!
- 8 yards Art Gallery Fabric Elements won on Instagram (Pictured)
Well, this was not intentional.
I reposted the photo thinking there wasn't a chance in the world I'd win and so the other sewists that follow me would know about the giveaway. (Seriously. Not joking.) And I was speechless when they commented that I had won!
Because the out matched perfectly with the fabric I won... I know more was added than I sewed.
I'm still amazed at the almost 58 yards I've sewn since joining the 2015 Stashbusting Group in March!
My new goal is to make it to 100 yards by the end of the year!
Is that doable? I'm hoping so!
-'- Jewel
Tuesday, September 29, 2015
Sew With Me September - The Cargo Duffle Bag

Whew! I finished my bag! The last component of my coordinates for the Sew-A-Long.
After not having time to work on it Saturday or Sunday, I was starting to get worried that I wouldn't get it completed!
I worked all day yesterday, to get it finished.

The pattern is free from Robert Kaufman Fabrics. (You can get here.)
I omitted the pocket flaps and next time around, I'm going to make the handles skinnier. It's slightly awkward holding it with them being so wide.
There are a few mistakes...(per usual) but for my first bag I'm super happy!
I didn't know if the hearts were going too much and a little childish but it turned out okay!

The bag gave me the opportunity to use the walking foot that came with the Singer sewing machine I thrift-ed back in June.
(I'll share it with ya'll one of these days...)
All I can say is..."Wow!" Walking feet make a ton of difference!
Along with the power of the all metal machine and the foot it sewed all the layers of fabric like a dream!
From the stash:
- Fabric
- Thread
- Zipper
- Interfacing
From the store:
- Quilt Batting
The Run Down of all the pieces...

I had a blast doing the Sew-A-Long! It was fun to stretch myself with having to coordinate everything and I'm so happy to have that heart fabric out of the stash!
If it wasn't for the Sew-A-Long the heart fabric would still be in the stash and I would still be puzzled on what to make with it!
I also really enjoyed the time frames put on each project as it helped keep me productive!
Speaking of the time frames... I thought my next project would be to keep working on the 1950s dress for a friend. ...TaMera had a different plan! She asked me to make her a fall shirt for an event on Saturday!! *enter freaked out emoji*
Off to frantically start sewing a blouse!
-'- Jewel
Fabric busted on these projects: 2 yards (1.8288 m)
Fabric busted since March 1st, 2015: 57 5/8 yards. (52.6923 m)
See Jewel's pledge and get more information on the 2015 Stashbusting Sewalong HERE
We would love to hear from you! Say a quick "hello" in the comments!
Thursday, September 24, 2015
Sew With Me September - Shorts {Simplicity 1371}

Yesterday, I finished my shorts for the Sew-A-Long!

The pattern is Simplicity 1371 a design by Cynthia Rowley. I really wanted to make the pants version but there only would've been enough fabric for one pant leg... That would be a new style!! hahaha
The fabric is from my Grandmother and it worked well for the shorts. I have no idea what kind of fabric it is so don't ask. haha

Because there wasn't enough fabric for the shorts, it has a fun pop of red hearts throughout! The left pocket as well as the facing!
Next up? The coordinating bag! It's all cut out just waiting to get sewn together!
(Hoping to be showing you that sooner than later!)
-'- Jewel
Fabric busted on these projects: 1 3/8 yards (1.2573 m)
Fabric busted since March 1st, 2015: 55 5/8 yards. (50.8635 m)
See Jewel's pledge and get more information on the 2015 Stashbusting Sewalong HERE
We would love to hear from you! Say a quick "hello" in the comments!
Saturday, September 19, 2015
We're On Facebook

We are now on Facebook! You can get updates and links to our blog posts without even leaving your news feed!!
Friday, September 18, 2015
Chambray Skirt {McCall's 6706}

When I saw this fabric in the fabric from Grandmother I knew I wanted it to be McCall's 6706! My favorite, favorite skirt pattern!

For the waistband, I added a facing instead of folding it in half like the pattern called for because I didn't have enough fabric for the entire width of the waistband.
This skirt is going to be like the blue jeans of my dressy side of my wardrobe! It's comfy, I feel great in it and it goes with almost everything!

For the waistband, I added a facing instead of folding it in half like the pattern called for because I didn't have enough fabric for the entire width of the waistband.
 |
| Obviously, I'm scheming about my next sewing project! |
 |
| Working on my "fun poses" like TaMera told me I needed to do! haha |
Happy Sewing,
-'- Jewel
Skirt made in August.
Fabric busted on these projects: 1 5/8 yards (1.4859 m)
Fabric busted since March 1st, 2015: 54 1/4 yards. (49.6062 m)
See Jewel's pledge and get more information on the 2015 Stashbusting Sewalong HERE
We would love to hear from you! Say a quick "hello" in the comments!