'Frayed of the Jacket Tutorial
Both of these jacket's we found at Kohl's 2 years or so ago. The dark green one we got for $10 and the light green jacket was on the super sale rack $2.97!! SCORE!! They mostly just hung in the closet, until now!
Enough about that. Here's the tutorial!
Both of these jacket's we found at Kohl's 2 years or so ago. The dark green one we got for $10 and the light green jacket was on the super sale rack $2.97!! SCORE!! They mostly just hung in the closet, until now!
Enough about that. Here's the tutorial!
Lay out your jacket as smooth as you can. You can iron it if you would like but its not necessary
Get your favorite pair of scissors and a pair of tweezers!
Cut about 1/2 inch or so along the edge of the sleeve. How much sleeve you leave is how long the fringe is going to be.
(Over explaining: want longer fringe cut farther away from the seam...)
Something like this
Repeat on opposite side
Your jacket vest should look like this
Notice how the fabric has grooves in it; those are going to be your new best friend!
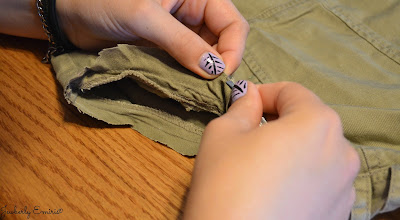
With the tweezers gently start pulling apart the fabric.
See how the fabric just seem to be unraveling that what you want!
Just keep pulling, just keep pulling, just keep pulling <--Finding Nemo reference...sort of ;)
This project will take awhile but it's easy to do! Here's a few tips that I found during the some what monotonous process...
Tip #1: Take your tweezers and make a hole about four strands away and make a hole, then gently pull the tweezers to the top
Tip #2: Switch from working on the front of the fabric and the back
Tip #3: Pull one strand at a time and just get them loose, then pull all of them away at the same time!
And once you are done on the one side...Repeat!
I have enjoyed the vests so much, wearing both many times!...Not at the same time of course ;) I'm sure you will love it as well!
If you find any tips in the unraveling process that helped you. I would love to hear them!
-'- Jewel


No comments:
Post a Comment